
This is the edited and completed version of the project I started at this year's Trenton Computer Festival (TCF). It is available on my Cricut Profile Page.
The instructions there are a bit terse, having to fit inside 500 characters. Here's a more complete version:
Supplies:
- 2 sheets 110-lb cardstock, such as Recollections Heavyweight Cardstock Paper from Michaels
- Adhesives of choice. I used Glue Dots and a tape runner
- Color printer (optional)
Preparation:
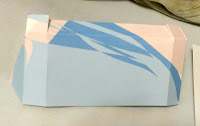
- Print an allover design on cardstock (optional)

- In Design Space, set all text to "not visible" (or just ignore the black mat)


Settings:
- Set your materials setting to "Poster Board" or "Poster Board +"

- If you have a Cricut Maker, use the Double Scoring Wheel.
- Cut "pretty side down" if appropriate (not what I did).

- Set your material size to 11" x 8.5" (letter)


Make the Project:
- Cut and weed both mats. You will have three pieces ("Stand", "Holder", and "Front")


- Take the "Stand" piece and fold all score lines to the back.
- Secure the top corners to the folded back top of the stand using Glue Dots.

- Hold the "Holder" piece so the three parallel score lines are towards the bottom. Fold the upper two score lines to the front; fold the lowest score line to the back.

- Use a tape runner on the plain side of the bottom of the holder to secure it to its adjacent section.

- Holding the "Front" with printed side facing you, fold all score lines to front at 90 degrees.

- Turn the piece so you are looking at the unprinted side.
- Using a tape runner or Glue Dots, secure the "Holder" piece to the "Front", matching up the large rectangle and the folded-up ledge beneath it.
- Fold the side fronts over the "Holder", and use Glue Dots to secure the corner flaps to the bottom ledge.

- Using Glue Dots, secure the two long tabs to the bottom ledge.

- Using the tape runner, Secure the front/holder piece to the "stand", matching large flat rectangles.


Finishing
Add business cards and set on table.
Note: if you prefer your cardholder to slant rather than stand upright, align the "Stand" with the top of the "Holder" rather than the bottom.
No comments:
Post a Comment