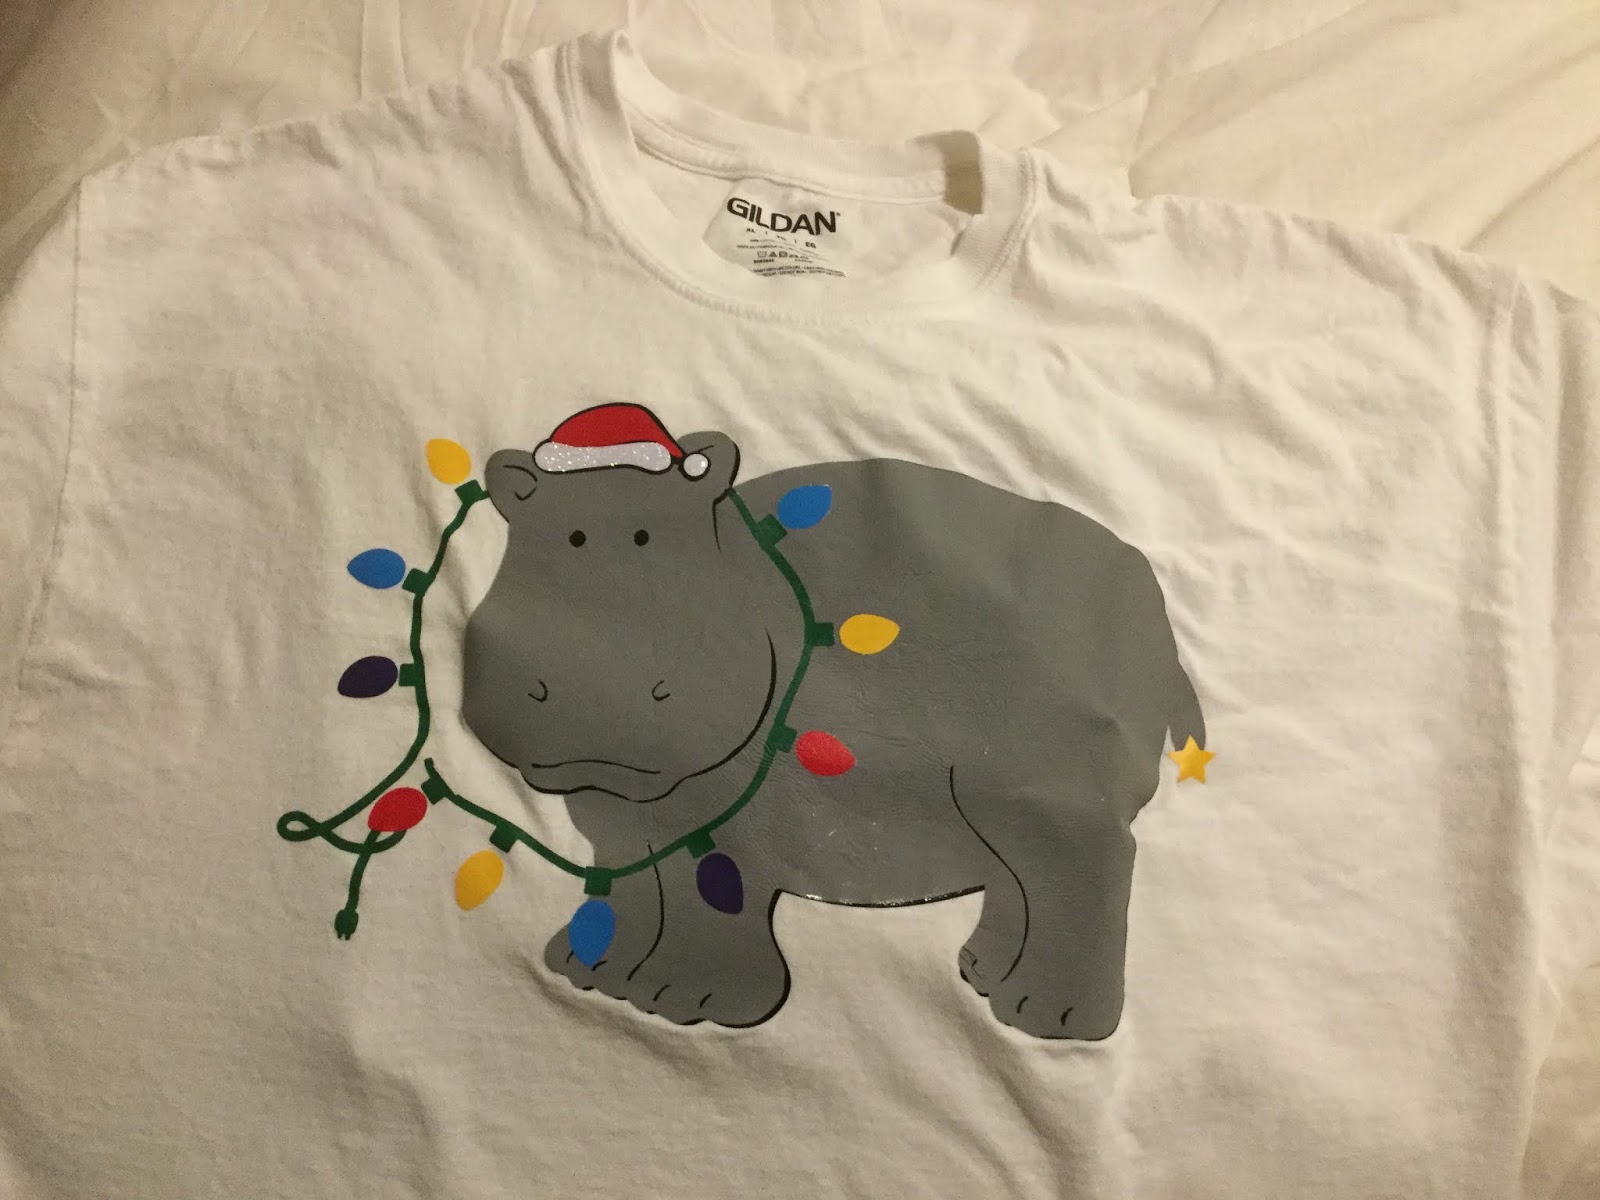
Cricut Design Space's Duplicate and Slice tools make it very easy to remove the underlayers from your design and create a finished product that is well-adhered, comfortable to wear, and long-lasting.
Here's how to do it.
I.
Select a design and bring it into your canvas. (You can either select something from Cricut Access and choose the "Customize" option, or select something from another source.) For this example, I'm using "Koala Hugging Heart" (#MA52A3F9) from Cricut's "A Land Down Under" collection.
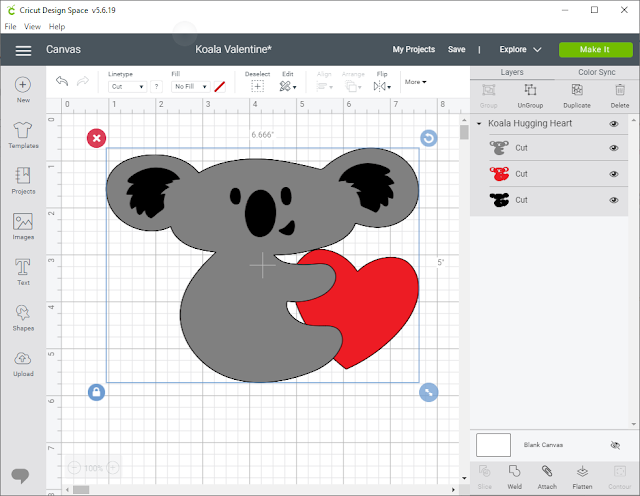
As you will note from the Layers panel on the right, this image is composed of three overlapping images, with the inside ears and features cut out of both the middle red layer and upper gray layer. You will also notice that the three layers are grouped.
.

While this would create a great three-dimensional image on cardstock (using glue dots between the black and red layers, and dimensional dots between the red and gray layers), in vinyl this would create two layers through much of the graphic, expanding to three layers over the koala itself. So, we are going to use the duplicate and slice functions to remove the underlayers.

As you will note from the Layers panel on the right, this image is composed of three overlapping images, with the inside ears and features cut out of both the middle red layer and upper gray layer. You will also notice that the three layers are grouped.
.
While this would create a great three-dimensional image on cardstock (using glue dots between the black and red layers, and dimensional dots between the red and gray layers), in vinyl this would create two layers through much of the graphic, expanding to three layers over the koala itself. So, we are going to use the duplicate and slice functions to remove the underlayers.
II.
Select the image.
From the Layers panel (or the Edit panel on a tablet or smartphone), select "Ungroup".
This allows us to work each layer individually, or in groups of two for slicing.
III.
Select the red and black layers. (You can select multiple layers by holding down the <Shift> key on a computer, or long-pressing the second and subsequent layers on your tablet or phone.)

Select Slice from the bottom of the Layers menu (computer), or from the Actions menu (tablet or phone).
This will give you three "slices":
- a red koala
- an identical black koala, and
- a black set of koala ears-and-features.

IV.
From the Layers panel, select the black koala. (It doesn't matter that the red koala is on top.)
Delete the black koala.

V.
Select the gray koala and the red koala.
To make sure they're aligned correctly, select "Align" from the menu bar (computer) or the Edit menu (tablet or phone), and select "Align left" and then "Align middle".
Select Slice from the bottom of the Layers menu (computer), or from the Actions menu (tablet or smartphone).
Again, this will give you three "slices":
- the original gray koala
- an identical red koala
- a red heart with cutouts for the koala's paws.
VI.
Select, then delete, the red koala.

VII (optional).
If you want to save vinyl, you can separate the inside ears from the facial features as follows:
Select "Shapes" from the menu bar, then select "Square".
Position the square over one ear of the koala.
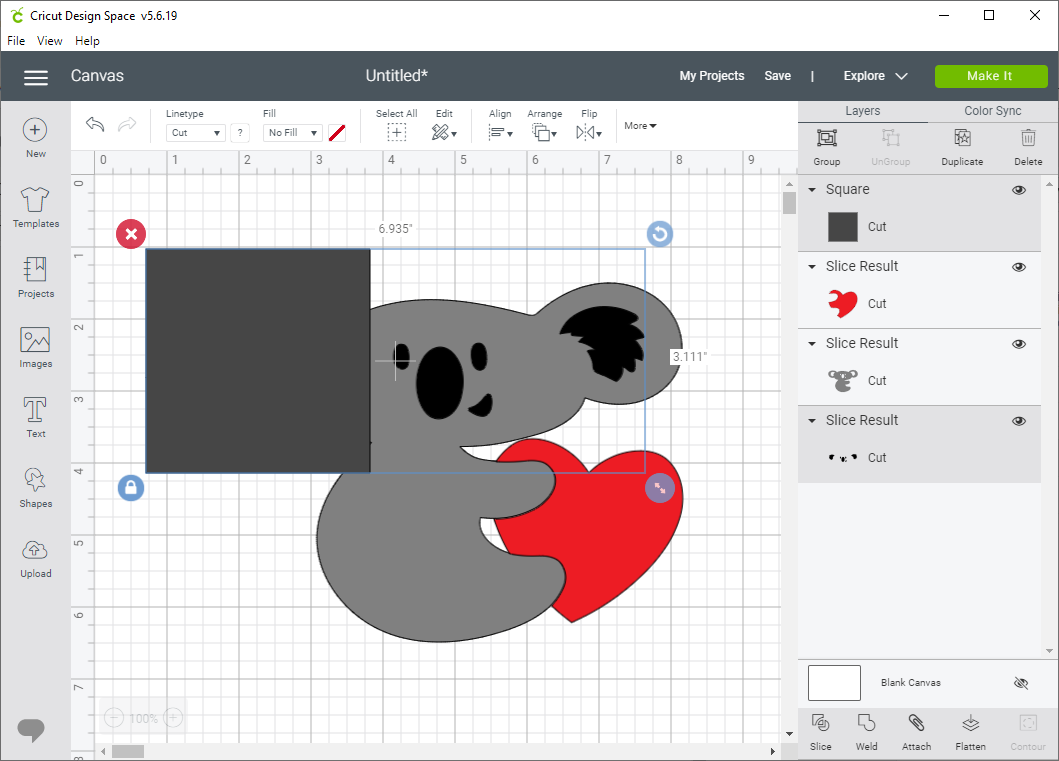
Select the square and the Slice Result containing the koala's features.
Select "Slice".
Select and delete the square.
Select and delete the extra koala inner ear.

Repeat for the second ear.

This will leave you with five layers instead of three. On the original 6.664" x 5" image, this will save about a 2" square of vinyl, about half of the black vinyl needed to cut the image already laid out. Vinyl savings will increase with a larger image size.
 |
| Color changed to yellow for visibility |
VIII.
Cut your image.
Remember to mirror iron-on vinyl (or conversely, don't mirror it and do a koala facing to the left). Weed all cut images.
IX. Applying vinyl
For the example image, iron on the koala first. Peel the carrier and keep it (we'll come back to it).
Position the facial features and inner ears. Place the carrier from the koala on top of the image before ironing on the eyes and inner ears.
Peel, retaining again the carrier from the koala.
Position the heart. Again cover the koala with its carrier before ironing on the last part of the image.
For a more complex image, you might want to make a copy of all the parts of the image, change it all to a single color, and cut out the copy in cardstock to use as a template.
Position the facial features and inner ears. Place the carrier from the koala on top of the image before ironing on the eyes and inner ears.
Peel, retaining again the carrier from the koala.
Position the heart. Again cover the koala with its carrier before ironing on the last part of the image.
For a more complex image, you might want to make a copy of all the parts of the image, change it all to a single color, and cut out the copy in cardstock to use as a template.