Wednesday, February 13, 2019

Knitting, Table Knitting, Tunisian Crochet, Crochet...

None of These Things is Not Like the Others

The current "big thing" in knitting and home decor is made with yarns that can be as wide around as a man's thumb (or larger yet). While the 1" diameter "US size 50" knitting needles have been surpassed by newer, even larger ones, the current fad is to "knit" a scarf or blanket without the use of knitting needles at all.

Mega Yarn for Table Knitting
Size 50 straight needles; Size 70 circular needle

Unlike its predecessor trend of arm knitting*, table knitting starts with a foundation chain laid flat on a table. Loops are drawn up through each chain stitch to form the first row of knitting. From there, one works back and draws the yarn up through the previous row of loops to form the next row of oversized stockinette stitch. The table keeps the stitches from tearing out as one knits row after successive row before binding off the final project.

Foundation Chain for Table Knitting
First Row, Table Knitting (bottom)

Let me note that traditional needle knitting has a number of different ways of "casting" one's initial stitches onto the needle. The most common method is sometimes called "long tail", the "Italian" cast-on is a variation of the long tail cast-on. In a "knitted cast-on" (KCO), one knits the original stitch, then knits into that stitch and moves it onto the needle to create a second stitch, and so on until the pattern number of stitches has been reached. Unlike the long-tail and its variations, if you removed the knitting needle from a knitted cast-on, you would find something that looks exactly like the foundation chain of crochet. Or the initial chain of table knitting.

Foundations (top to bottom): Crochet, Tunisian Crochet, KCO (needle removed), Table Knitting

The first row of table knitting draws up a loop of yarn through each stitch of the foundation chain.

If this were done on knitting needles, the work would look exactly like the first row of knitting from a knitted cast-on (KCO). If it were done with a long or cabled crochet hook, it would look like the first half of a row of Tunisian Crochet (which we used to call "afghan stitch").

>First Row, Table Knitting (bottom)

The second row of table knitting works back across the loops of yarn, drawing a new loop of yarn through each of the first row of loops of yarn. This is consistent with the working of a knitted fabric, except that you see the loops laid out on a table instead of held in place by a needle. From here, table knitting continues on in the same manner of knitting a flat piece completely from the right side of the work - the same as if one were arm knitting or - knitting ambidextrously on knitting needles (my preferred method of working flat pieces).

Table Knitting versus Needle Knitting
Table knitting and arm knitting both bind off their stitches similarly to needle knitting. The usual method is to knit two stitches, slip the first stitch over the second, knit the next stitch, slip the previous (second stitch) over the new (third) stitch, continuing in that manner until you are left with one loop on one needle, and the thread all but secured.


The method I learned as a girl was to knit two together, slip the new stitch back to the other needle, and repeat instead.


That second bind-off method, done with an afghan hook, is identical to the second part of the "basic stitch" of Tunisian crochet.

Tunisian Crochet: Finishing a Row
All of this suggests to me, as I've suspected all along (growing up with both knitting and crochet skills), that there is a continuum between knitting and crochet, and a way of leveraging one set of skills to teach, or learn, the other.

*Arm knitting uses the knitter's arms in place of knitting needles. The stitches are long-tail cast over one arm and the work is done entirely from the front side of the work. Most arm knitting is done with several strands of "size 6 - chunky" yarns worked as one.

Friday, February 8, 2019

Go Red for Blue Fridays

The first Friday of February has been, for the past decade or more, a day to wear red to remember Women's Heart Health. It's important because women's cardiac symptoms are often very different from men's, and tend to be ignored — yet heart disease and heart-health-related causes are the most common cause of death among women.

It's been a bit of a dilemma for me to wear red since the Diabetes Online Community started the practice of wearing blue on Fridays for Diabetes Awareness, and I've been living with type 2 diabetes for the past seventeen years. (The irony is even greater when one considers that living with any type of diabetes raises one's risks for heart disease and heart-related death, and that the diabetes that caused the heart-related death is often ignored in the post-mortem.)

Some years, I'll honor both by wearing a blue base layer with a red short-sleeved shirt. This year, I decided to use bleach, dye, and my Cricut to create a blue-edged T-shirt with both Go Red and World Diabetes Day (WDD) logos.

My original idea was to have the blue circles ringing around the sleeves, half into the blue-dyed areas; I was debating whether to go with a heart, a red dress, or the American Diabetes Association's "Stop Diabetes!" hand on the body...


I started with two Gildan crew-neck t-shirts — one in Heather Red and one in Antique Cherry Red. The Heather Red bleached to a very pale pink, enough to pass for white.


The Antique Cherry Red, based on black and magenta, didn't do as well. The black parts turned out to be permanent to bleach, leaving me with something closer to a Sport Gray.


There is a risk to trying multiple methods of color removal on a single fabric, and that is that each treatment weakens the fabric to the point of tearing or disintegration. (Note: bleaching animal fibers — wool, silk, alpaca, etc. — will dissolve the fabric. While bleach can weaken linen and cotton, they are generally safe to bleach.) Nevertheless, I tried Rit Color Remover on the gray sections. It didn't do anything to the color. Nor did a couple of patch tests of ordinary household peroxide...

After the color removal process, I dip-dyed the hem and sleeve edges of both T-shirts in concentrated fabric dye and let them set for a day before washing out the excess. Unfortunately I missed on the color and the blue was a bit too red to do the rings of blue circles, so I had to settle for putting single circles on a white flag (per the World Diabetes Day logo use requirements). I also wanted to do things quickly, so I settled on the Go Red dress cut out from a white heart. I cut these from my Cricut and prepared to iron them on.

It was at this point that my concerns regarding the color removal process came to light. While pre-pressing, I found a couple of small holes in the blue-dyed portions of the Antique Cherry Red shirt. OK, I figured, I might just have to wear the shirt tucked in...


The holes only got worse as I ironed on my designs. I did wear that shirt for my morning shift at work, but it was largely covered up by an overlayer. Taking it off, I ripped a couple new holes in the sleeve.

Aside from the vinyl heart being too large and too low, the rest of the T-shirt designs came out OK. I wore the Heather Red shirt later that day, and along with presenting my usual Red Dress Cookies, it was a great Wear Red day.

Wednesday, February 6, 2019

Red Dress Cookies


Ever since my Other Half found Ann Clark's Little Black Dress cookie cutter at Candyland Crafts, I've been making Red Dress Cookies for the first Friday of February, "Wear Red" day.

The process is simple:
I start with my go-to Sugar Cookie recipe ("Basic Sugar Cookie" from Woman's Day's 2009 Holiday Cookies "Special Interest Publication"). It's unusual in that one third of the sugar (by weight) is replaced by confectioner's sugar. The cookie recipe is designed for 1/8" thick cookies, which is perfect for a simple cookie cutter. (Plunger cookie cutters, and those with internal designs, require a 1/4" thick cookie. Those recipes tend to be closer to shortbreads than to classic sugar cookies.)

I use a variation of the "Frosting Glaze" that follows that recipe, rather than a more traditional Royal Icing. The cookie glaze does not use egg whites or meringue powder, just confectioner's sugar, a bit of corn syrup (or I might substitute honey, molasses, or maple syrup depending on what flavor profile I'm looking for), vanilla (or other flavoring), and milk (though I usually use skim milk or water).

Once colored, I thin down the icing enough to paint on the dresses — a method I generally prefer over piping the edges and flooding the centers — and then add a white heart sprinkle to the left chest, consistent with The Heart Truth Red Dress pins.

Current Red Dress Images from GoRedForWomen.org Shop

NHLBI's "original" Red Dress Pin
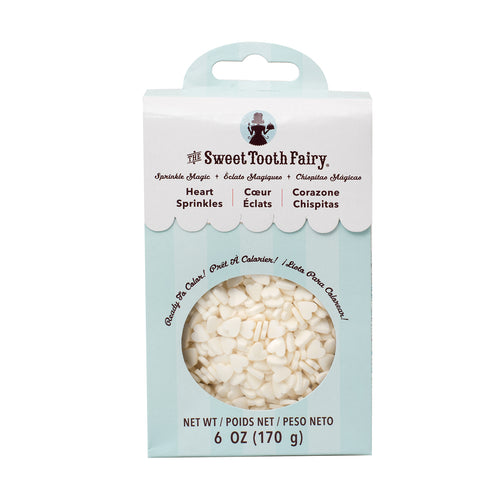
Some years, I need to purchase a bottle of red, white, and pink Wilton hearts. Other years, I need to fish out the white hearts from a bottle of multicolored hearts. My current supply is a bag of white Sweet Tooth Fairy hearts meant for custom coloring.

Magic Sprinklers - Sweet Tooth Fiary
In past years, I've used other cookie cutters and designs as well. The cookies below (made in 2011) use a cutter CK Products calls "Gown", and which other distributors (such as Sur La Table) have called "Wedding Gown" or "Bridal Gown", decorated for a group of Renaissance Faire friends. At the time I got this cookie cutter, there was also a tank dress design that was sometimes called "Bridesmaid".


While some may cavil at the use of butter, sugar, and wheat flour — ingredients said to put one at greater risk for heart disease — everyone loves a good sugar cookie. Using them to remind people of "Go Red" and women's heart health is just the icing on top.

Wednesday, January 9, 2019

Working With Vinyl Scraps

One of the downsides of large T-shirt designs such as "Hippopotamus for Christmas" and "Dreidel for Dummies" is the amount of heat-transfer vinyl (iron-on, HTV) that they use. Not counting the costs for licensing Cricut Access images, the hippo T would have cost me $30 in materials; the dreidel T, $20, had I not been working at Michaels and been able to use Associate discounts on top of sale prices. I'm not counting design time or application time, and I've saved a significant amount of vinyl on the hippo by delayering the images. This would put the retail price of a vinyl T somewhere in the $30-40 range, even for a $2-on-sale craft T-shirt. (The blanks Cricut associates use on their instruction videos run $10-15 on sale at places like Target and Old Navy, making a more "designer" look that much more expensive!)

My colleague S. would have loved a hippo T, but the materials costs alone would be out of budget for her. I found a cute Snowman T-shirt pattern on Design Space that could be made cheaply from scrap vinyl — with a few tweaks to the pattern.

When I looked at the mats, I noticed all the little black dots for the snowman's eyes and mouth were attached, as well as the white dots for the reflections in the snowman's eyes. That ends up creating a lot of wasted vinyl. I also noticed that there was no way to register the cut so one knew exactly where to place the orange nose.


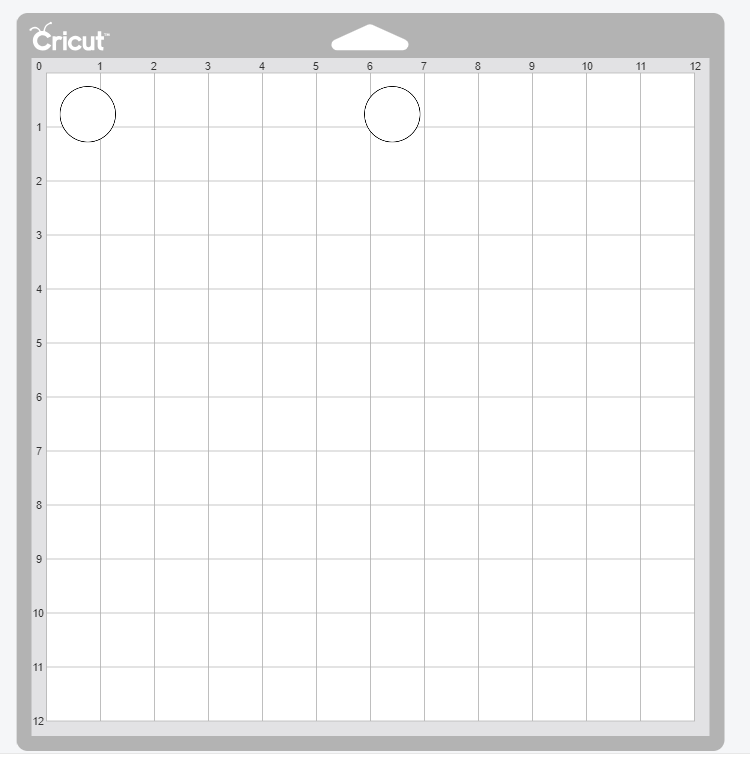
Since Design Space doesn't have a good way of setting registration marks, I decided to create a paper template.

First, I attached all of the design elements into a single cut image and resized it to an appropriate size for the T-shirt. Attaching elements turns them all the same color, but it's easy enough to turn them back later.)


I used this monochrome to cut my paper template. Instead of weeding the background, I weeded out the design elements to produce a template with openings for each of my vinyl cuts. While the weeding isn't perfect, it's sufficient for my purpose.


Next, I detached all of the design elements and returned them to their proper colors. I also delayered the inner eye, so I would only have one layer of vinyl throughout the shirt.


You'll notice these use a lot less vinyl if cut from a fresh roll. Each piece can be moved individually, so they can be positioned to use waste vinyl, either manually (in the Web app) or by using the Snap Mat feature on an iPad. I used scrap vinyl from "Dreidel for Dummies" and "Baby, It's Cold Outside" for my white and black, and the rest of a "row" of rolled vinyl for my orange.


My final cost: about $6, if I include the vinyl as rolling inches.

Needless to say, S. was surprised and delighted.

Tuesday, January 8, 2019

I Want a Hippopotamus for Christmas

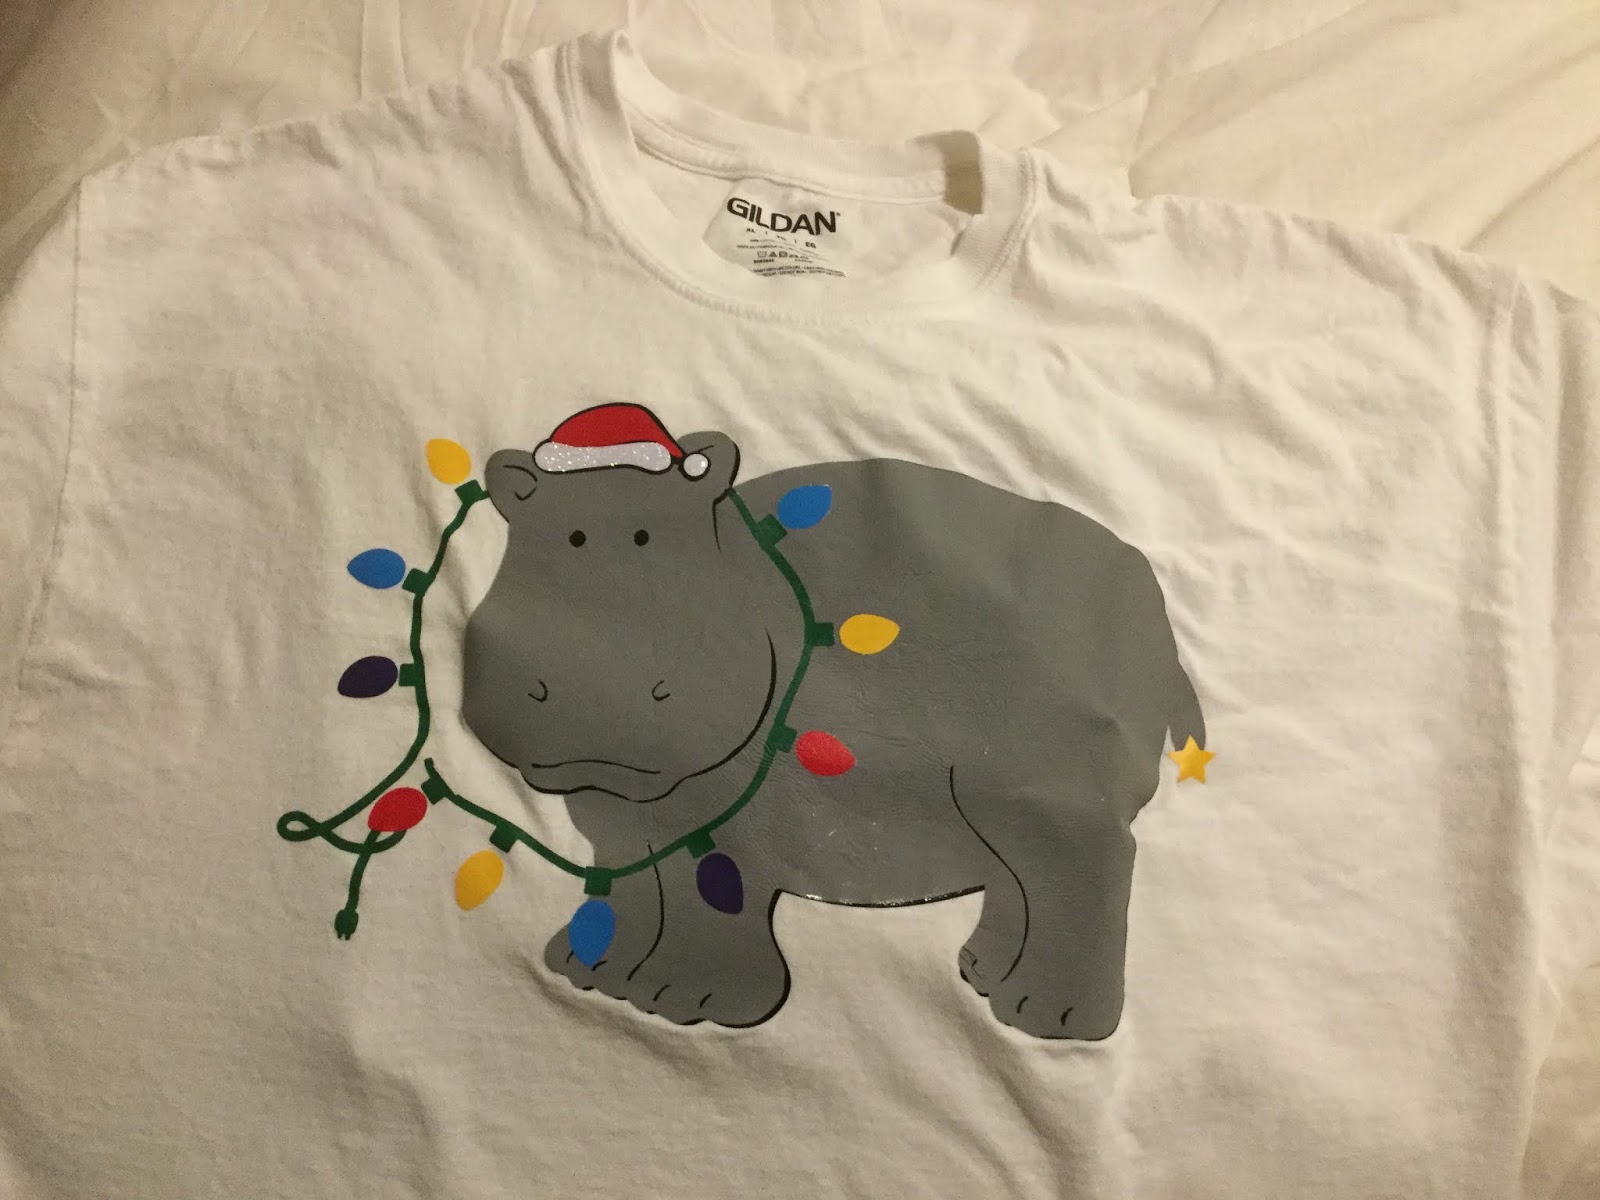
Last year, the overwhelming "stop playing this, already" Christmas song was Elvis's "Blue Christmas", leading me to do a pair of multiprocess blue T-shirts including the ghosts of Elvis, and on one version, (Bob) Marley's ghost. ("The obligatory Dickensian reference.") This year, I must have heard "I Want a Hippopotamus for Christmas" a dozen times between Thanksgiving Day and the following Monday. So when my sister decided she needed some new Christmas T's for a competition at work, hippos were still on our mind...

Since I'm not much of an artist, I searched Cricut Access for images of hippos. To make the friendly-looking beast (Cricut Access image M2E803Christmas-y, I added a Santa Hat (Cricut Access image M188702D) and a string of lights (Cricut Access image M8AE3A8A) to the composition. Having all the elements I needed, I had to combine them into an image that made sense.

I removed the grayscale hat, moved the red hat and changed its angle to sit on my hippo's head. Then I had to see about moving the lights so it looked like they were being worn as a necklace. Fortunately, the hippo image is a group of layers, some of which include a separate head.


I ungrouped the hippo and moved the two head-only images in front of the lights. I then turned on the narrower of the black underlayers so we could see the hippo's black eyes.


It was about this point that I ran my first paper prototype and found that the slices that give form to the hippo's legs, toes, nostrils, ears, and mouth are just single cuts which would disappear in an iron-on. At that point I hid everything but the hippopotamus, screen-captured my Design Space screen, brought it up in Paint, thickened the lines in question, and saved it out as an image to import back into Design Space. I used the original image and the Slice function to separate the better-defined hippo into head and body sections.

The other thing I realized is that half the lights are digging into the hippo's neck. I used squares, the Slice function and the Weld function to turn the light sockets around so
they all faced out, and rotated the lights as necessary.


At this point, the folk at Cricut would have you think the design was ready to go...

Not so fast!

With all of the layers involved, the finished T-shirt would be very thick and inflexible. I needed to turn off everything I didn't need in the finished shirt, and once I cut everything, trim things back to minimize the amount of layering needed. (That meant cutting the head off the black version of the entire hippo, because it was only duplicating the black head that would lay over the string of lights.) I also detached all of the lights so they would use a lot less vinyl; I could position them by hand.

After weeding, I placed everything in layers in some semblance of registration so I knew which layers had to go on the shirt in what order. I printed out a screenshot of my Design Space design so I knew how it all had to go together. Then I took it all to work so I could use our classroom's Easy Press to put everything together.


According to my sister, the shirt was a hit!